Sunday, April 4, 2021

What is Headlight Restoration

Having Headlights Restored

Headlight restoration, when done right, can mark the difference between a functional and dysfunctional headlight.

Did you know that faded headlights are in fact, illegal and unsafe?

In fact, vehicles with faded headlights won’t pass a roadworthy certificate.

This will deem the vehicle illegal for road use.

Opaque headlights will reduce your visibility at night up to a massive 75%.

Replacing headlights is expensive and in most cases not necessary.

Yes, you can fix them yourself, it’s also recommended that you find a professional car detailer to help you fix the problem.

But what does headlight restoration really mean?

headlight restoration done

WHY HEADLIGHTS DISCOLOUR

As vehicles age, the plastic headlight lenses deteriorate due to abrasion and permanent Headlight Restoration & Repair Specialists Our Technicians UV damage.

The headlights become a dirty yellow colour with an opaque surface.

This surface damage can dramatically reduce the light output and make headlights less effective if not treated early.

In climates like Brisbane, our tropical climate damages porous surfaces like the plastic that makes headlight lenses.

A common myth is that headlight deterioration happens on the inside of the lens. This is not true, the damage is all on the outside.

There are two different types of headlight lenses – Plastic and Glass.

Glass Headlights

Glass headlight lenses do not deteriorate like plastic, but they chip and crack and need replacing.

In the ’90s glass headlights were phased out and replaced with polycarbonate so the only glass headlights are on older-style cars

Polycarbonate Headlights

Headlights on virtually all cars are now made of polycarbonate. It is an extremely tough plastic that is also porous and discolors in UV rays. The fading that we see is called Oxidation, and this also occurs on the paintwork of our cars.

To prevent oxidization to the polycarbonate, headlight manufacturers apply a protective hard coating to the outside of the lens to seal and protect the headlight and plastic from discoloring.

Over time, this factory protective clear hard coat degrades (oxidizes) and needs to be removed entirely and replaced with another quality protective clear hard coat that lasts.

Benefits Of Headlight Restoration

Modern-day headlights are made from a polycarbonate plastic material. Even though this makes them sturdy and durable, the main downside is the oxidation that happens over time from UV rays

In warmer climates, this leads to cars needing headlight restoration more often than cars in cooler climates. Below are some of the main benefits ofcleaningyour headlights once you notice they’re dimming or turning yellowish.

  • Enhance road safety:Dull and dim headlights means impaired vision while on the roads. If you do regular night driving, this is a safety concern.
  • Help to maintain your car value:When there’s a fault in your car, the value goes down. To keep your car roadworthy, you will need to keep your headlights maintained.
  • Saves you money:Restoring discolored headlights means fixing the ones that are already in place. This costs less than having to buy a new one from the stores.
  • Improves your vehicle’s aesthetics:Dull and yellowish headlights give your car a boring look. However, by restoring the headlights, you can give your car a whole fresh appearance.
  • Increase visibility:oxidized headlights dull the light that is being emitted. However, restoring the headlights will give you sharp new vision at night

headlight restoration

What To Check For When Researching Headlight Restoration

Many low-cost headlight restoration services only remove the degraded factory protective clear coat.

This is polished off and it leaves the unprotected plastic lens bare.

Within months the unprotected headlights will start to discolor and develop ‘crazing’ or tiny cracks in the lens surface.

Doing this headlight restoration method removes all the protection that stops the lens from being damaged by UV rays.

The headlights are covered with this coating to protect it for this reason.

Doing machine buffing on your headlights is a short-term fix and will cause permanent damage to the lens as it is left unprotected.

Don’t Take Short Cuts

A correct Headlight Restoration is when the car detailer completely removes the old degraded factory clear coat. The headlight is lightly polished and then the surrounded areas of the car are masked up.

The headlights are sprayed with a protective coating and this cures to create a new protective clear coat that etches into the polycarbonate.

It creates a ‘rock hard’ protective clear coating which is also chemical resistant, non-yellowing, and lasts as long as brand new replacement headlights.

How To Restore Headlights

There are two ways to restoring your headlights.

One, you can do it yourself, or two, you can hire a professional car detailer.

If you are going to do it yourself, be sure to buy a proper kit.

There are some old wives’ tales for cleaning headlights, and one of those is that toothpaste is good for cleaning headlights.

Now, this method used to work on glass headlights. Toothpaste is gentle abrasive but should not rub any abrasives on your headlights as you are wearing down the much-needed sealant that protects the lens.

When the coating is damaged it needs to be removed entirely and replaced. Don’t add further damage with a mild abrasive like toothpaste

We recommend you find a car detailing specialist to help you out rather than trying to do it yourself

But If you decide to do it yourself, here are the steps to take;

You will need to buy a headlight restoration kit before you start.

  • Wash the car.
  • Tape up the edges surrounding the headlight.
  • Use sandpaper to remove the cloudiness on the surface
  • Use the supplied polish to smooth out the lenses.
  • Apply any supplied final coatings and follow the instructions

Wrapping it up

Keep your car roadworthy and provide better night vision while you are driving by getting a specialist to check them out and advise you appropriately.

Once you notice your headlights are dim, foggy, have a dull haze, or are turning yellowish, this would be the signal to book your car in for a car detail and headlight restoration service.

When you combine the 2 services, your car will look new again with polished paintwork and bright new headlights.

We are your local headlight restoration and repair experts. Please contact us to learn more about our car detailing Brisbaneservices

The Article What Is Headlight Restoration First Appeared ON

: https://limitsofstrategy.com

Wedding Makeup Tips

Wedding Make up Tips

Looking for wedding makeup tips before your big day?

Then you’ve come to the right place because we’ve compiled the best wedding makeup tips that will help you look flawless no matter what your wedding budget is.

Just say “yes” to the following bridal makeup rules and prepare to shine!

wedding makeup artist

The Wedding Makeup Dos:

Take Care Of Your Skin

An in-depth day and night skincare routine are essential at least 3-6 months before your wedding date to make sure your skin is ready for the big day!

This helps with how the makeup looks and stays on your skin all day.

Make a trial appointment 3-5 weeks before your wedding.

Make sure you have your trial at least three weeks but no more than 5 weeks before your wedding. If you are planning to have a spray tan on your big day, do a test run before your makeup trial, so your artist can see what color your skin will get from the tan,

Be your best self on your trial day. Feel your best on your trial day. Make sure your hair is done, and you’re wearing jewelry so you can see how the overall look comes together on the day.

Wear a light-colored top in a similar tone and shade to your wedding dress. If you have your makeup tested in a store so you can see how the makeup looks against it, and take a photo of yourself in daylight (without flash) to see how it looks before you buy anything.

Accentuate Your Eyes

Brighten up dark areas under your eyes with correctors and concealers.

It’s all about choosing the right shade to match your eye color.

Your eyes should be the focus, not the actual makeup.

A trick to make your eyes pop is to keep color intensity as close to the lash line as possible. Fake lashes also play a big part in creating the pop without requiring heavy eye makeup.

It is always about “lashes and liner.”

Bring References To Your Trial.

Look for pictures of the makeup you really like and bring them to your appointment.
Try to figure out what you like about the makeup in the image and keep in mind that Kim Kardashian’s makeup may not translate to you if you have Dita Von Teese’s skin tone.
Look for faces that have similar coloring and features as you so you can have a similar look created for you.

Wedding Makeup Tips

Consider Colour

Remember that bridal makeup needs to have enough color to balance out the whiteness of the dress. There’s a big difference between everyday wear and a wedding dress, so there should be a difference in your makeup, too.
Start by making sure your skin tone looks even and smooth, then add color to your cheeks and lips to make them glow.

Use Individual False Eyelashes.

They’re a brilliant way to make your eyes stand out and look much more subtle than a full strip. Choose different lengths to create a really natural, fluttery look and nestle them in between your natural lashes rather than pinning them on top.

Don’t skip the basics.

Spend time and care on the most important features of your face, like beautiful, natural-looking skin, gently groomed brows, and feathery lashes.

If you get these fundamental factors right, the rest of your makeup will take care of itself.

Research Makeup Application methods

They can be slightly different from your daily makeup routine.
For example, If eyeliner pencils always smudge because you have oily eyelids. Try working with a dark eye shadow, apply it with a slightly dampened eyeliner brush to make it like a pencil liner but with better staying-power.

Wedding makeup tips

Go Pro

The best wedding makeup should last as long as your day. That’s why professional products should be used – foundation, concealer, lip, and eye products. They offer superior durability to see you through your wedding day and night.

Accentuate The Brow Bone

Complete your makeup look with a subtle highlighter shade on the brow bone to really bring out the eyes.

Choose a light, matte shade and dab it on the outer corner of the brow bone to draw attention to that area of your face. Do not go for a shimmer or shine. It can make you look sweaty or oily in the photos. Trust us on this tip!

Take A few Touch Up Products

Ensure you or a bridesmaid have a powder, lipstick, concealer, and a small brush or sponge in your bag.

These are products you can quickly touch up to ensure you look confident throughout the day.

Wedding Makeup

The Wedding Makeup Don’ts:

Have your makeup tested anywhere there are fluorescent lights

If a professional makeup artist is coming to your home, arrange a time when it’s still light outside.

Let A Makeup Artist Steal Your Identity.

For many people, their wedding is when they can be really excited to have someone else do their makeup.

Still, there can be a temptation to just give in to the experience and take the suggestions from the makeup artist – They do not know you that well, and you may not feel like you.

We would advise real caution here; you don’t want to surprise your chosen one at the altar by showing up looking like someone else.

Whether you hire a makeup artist or do your own, we believe that the best bridal makeup is simply the most exquisite version of what the bride normally looks like – after all, you want to look beautiful, not your makeup.

Don’t Wear SPF

If you’re being photographed with flash, don’t wear SPF sunscreen because the flash can bounce off your skin and make you look washed out. Be sure to test this on your test shot by taking a photo with the flash on.

Wearing Too Much

It’s an absolute myth that your makeup needs to be applied for photos.
Many wedding photos are taken in natural light, and if you choose a heavy base, the makeup will look obvious.

As for the flash, you just need to make sure your T-zone is matte, which you can achieve with fine translucent powder and blotting powder, not layers of makeup.

Anything Too On-Trend

Remember, you will be looking back on your wedding photos for the rest of your life. Don’t look back at them and wonder, “What the hell was I thinking!”

So it’s best to avoid statement looks and opt for something timeless and classic.

That glitter eyeliner and cut crease look that you saw on a Youtube tutorial might look super pretty and modern.

In twenty years, it will probably look tired and dated! Some looks never go out of fashion – think of the classic red lip or a beautiful winged eyeliner – It is timeless.

That doesn’t mean you have to go for a symphony of beige tones if you’re used to bolder makeup – vintage wedding gowns, in particular, can look stunning with a classic Old Hollywood lipstick color.

Don’t Be Afraid To Go A Little Lighter.

Neutral, brown, and pale lip colors can look washed out in photos, so choose a lipstick that’s a shade or two lighter than what you normally wear.

If you usually wear a neutral shade, it should be worn as a base, with a pink or rose color on top. If you usually wear dark lipstick, use it as a base, and apply a lighter pink over it to spice up the color.

Pink tones such as roses and plums are all great, classic colors for brides.

Apply Makeup To The Face Only

Instead, sweep it down your neck and over your shoulders if necessary. This will ensure your face isn’t a different color or even texture than your body.

Everything should look even for the most natural look possible.

A great way to blend uneven skin tones together is to use a light fake tan. Do this the day before the wedding, not at night, and beware of darkening your skin tone too much, as this will make your complexion look less natural.

Natural wedding makeup

Long Wearing Makeup

Forget to decide what kind of care you would prefer for the day

Do you want to check that you look good throughout the day, or do you just want to forget about your makeup as soon as it’s applied?

Waterproof mascara is an obvious requirement, but it’s also worth considering many cream eyeshadows are long-lasting, and you can be sure they’ll stay where you put them.

Making Your Eyes Too Dark

Define your eyes by applying color in the eye crease, but avoid using a shade that’s too dark or doing too much contouring in the eye socket line. It can distract from the eyes themselves.

Too Glossy Or Too Matte

It’s best to avoid lipsticks on either end of the texture scale; too glossy, and they’ll only last five minutes, while too matte can leave your lips dry and cakey when it’s time to kiss your groom.
A moisturizing, satin lipstick is best for a wedding – this type of formula makes your lips look their best and goes on most evenly and naturally; several thin coats dabbed on in between for an extra long-lasting finish.

Get The Timing Right

Remember to allow at least 45 minutes to an hour for makeup application on your wedding day.

Now relax – You have everything planned. Remember if you are not confident with hair and makeup, there are many mobile makeup artists and hairstylists that can come to you on your special day

The Article Wedding Make up Tips First Appeared ON

: https://limitsofstrategy.com

Tuesday, March 16, 2021

High Pressure Cleaning Your Driveway

High Pressure Cleaning Your Driveways and Pathways

Driveways and pathways serve one important function—creating connectivity between buildings and outdoor areas.

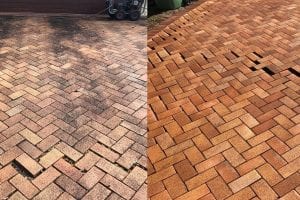
If you have spent time, money and effort getting your sealed concrete or exposed aggregate driveway installed so why not make sure you look after it properly with high-pressure cleaning.

Your driveway will be the first thing you see when you arrive home at night and when you leave your house in the morning.

Over the years, your driveway will take a heavy pounding from vehicles, tyre track marks, oil spills and whatever else the elements want to throw at it. Keeping it clean will be beneficial and booking in a pressure wash each year will be worth it.

Here Are 6 Reasons Why Do High Pressure Cleaning

1. Cost-Effective

Compared to other forms of cleaning that involve using detergents, pressure cleaning is cost-effective and doesn’t cost an arm and a leg.
Outdoor cleaning with the high pressure cleaner does a better job than manual cleaning. Using the high pressure cleaner is also quicker which means that you’ll save money as our cleaning will take less time.
Who wants to pay for a gardener to manually remove moss and weeds by hand?

2. Environmentally Friendly

Pressure cleaning is environmentally friendly because you do not need cleaning solutions. The high pressure does all the work. It is basically chemical free cleaning.
To make it better, you can also use hot water to have your driveway cleaned.
As you can see, all these materials are safe and do not pose risks to the environment.

High-pressure cleaning also saves water.
When you clean surfaces normally, you need to soak grime and dirt with water to soften it before you can easily remove it or wash it away.
It needs a fair bit of water to soak the whole area and then you need more water to wash it away! So, with high-pressure cleaning, you saving our precious water while removing dust and dirt off the surface.

3. Enhances Curb Appeal

When your pathways and driveways are properly cleaned, they get a fresh new look.
Besides, it goes without saying that a visually appealing home has a high curb appeal.
Improving the appearance of your property or business before sale. This can dramatically effect the sale price of your property. If you are planning on selling your home, high pressure cleaning is a must have on your property sale checklist Remember to also do any other hard surfaces like retaining wall or patio floors in the presale clean up.

4. Saves Time

Pressure cleaning is quick and effective!
A professional high pressure washing team will have suitable machinery for the different outside areas.
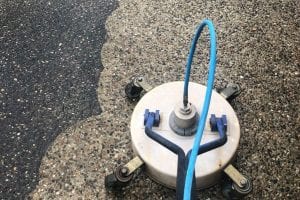
Pressure washers are used on smaller areas and on stairways and walls. On bigger smoother areas circular polishing machines do a fast and effective clean. They are fast and leave no lines or uneven cleaning marks
Compared to traditional methods like patch cleaning using a brush or broom and detergent you’d literally have the entire driveway cleaned in the time it took to clean one small area.

When you hire professional cleaners you will also get an even result without any noticeable cleaning lines
Time is priceless and you can enjoy your free time when out sourcing this job.

driveway cleaner

5. Promotes Safety

With properly maintained and in good condition driveways or pathways it creates a safer environment for all of those who are walking on your pathways. It reduces slip hazards and gives better visibility to any uneven surfaces.

Not doing regular cleaning of your driveways and pathways can lead to a build up of dead leaves and gravel.
Not only does it get slippery when it is wet it also starts to weaken the surface of the driveway.
The other consideration is moss, lichen and mildew can also set in and it is difficult to remove and it can be slippery.
If you have any slope on your pathways or driveways you do want to pay attention to anything that interferes with traction.
Hiring a professional pressure washing company will guarantee the safety of your property and keep you out of harms way. Many injuries happen from people trying to DIY jobs around the house.
Let us do the hard work and get into the hard to reach areas.

6. Protects Concrete Surfaces

Concrete surfaces do start to degrade when they’re neglected. One sure way of letting that to happen is by allowing moss, and weeds on these surfaces and in the cracks and joins. The problem is, the more they grow the more damage they do. Over time the concrete surface weakens.

As the surface weakens it becomes uneven and increases cracking along join lines and distorting the grout. Eventually you may have to repair these areas of the driveway or pathway and it will be a costly ordeal.
Once you book in for regular pressure cleaning, the less weeds growing will help to keep the surface intact.
With no lichen and moss growing on the surface you can be sure of not having to do any restoration work as often.

Wrapping Up!

When is the best time to have your driveway power washed?

power washing your driveway can be any time of the year. Most homeowners like to have it done during warmer weather in the lead up to Christmas. This is when people are doing more entertaining.

The Benefits Of High-Pressure Cleaning To Your Driveway

We use our pressure cleaning machines to get deep into the surface to completely eliminate unwanted dirt and other contaminants.
Our services are completely hassle- and damage-free, leaving behind renewed outdoor surfaces. We value your time and perform services quickly and efficiently.
Our team is fully accredited and licensed – you can trust that we are the Brisbane high pressure cleaning team qualified for the job.

The Article Benefits of High Pressure Cleaning First Appeared ON
: https://gqcentral.co.uk

Sunday, March 7, 2021

Ceiling Repairs Brisbane Plasterer

Brisbane Plasterer

(07) 30640686 ​

19 Pleasant crt Cleveland Qld 4163

https://brisbaneplasteringtier2.s3-ap-southeast-1.amazonaws.com/brisbane+plasterer.html

Plaster Ceiling Repairs

A sagging ceiling is an indication that the ceiling is at risk of falling.
It is a hazardous building condition and the ceiling can collapse with no warning.
Falling ceilings weigh a lot!
Plasterboard is heavy and it will do a lot of damage to the room and cause injuries to people who are under the collapsed areas.

repair ceilings

Sagging Ceiling Repairs

Often they can start sagging and cracking without a home owner noticing.
Sometimes there will be an indication like white plaster flakes from the damaged ceiling being found on the floor
Other signs that you may notice are:

  • Sagging or cracking
  • Small round circles (these are screws popping)
  • Water stains or patches on the ceiling
  • Swollen or bubbled areas
  • Dark patches or mould growth
  • Areas of moisture or ‘sweating’

All of these are indications that you need to call a plasterer in to asscess what is happening and get it repaired.

Home Owners With Damaged Ceilings

Sagging ceilings occur because the gyprock board is coming away from the structural joists.
Sagging ceilings do happen in the ageing process of any building, and all home and business owners should be watching for signs of sagging.

When it comes to a ceiling repairs, the ceiling isunstable and it’s time to have a professional ceiling fixer look at it.
If there is by water damage due to a storm or a burst pipe, you can often get your home insurance to cover the repairs.

Tenants With Damaged Ceilings

If you are renting a residential property or a commercial property and you’re noticing the signs of a sagging ceiling. You do need to make a report to your property manager.
They will come an assess the damage and arrange for the repairs to be made.
Do not ignore the signs as a damaged ceiling can collapse with no warning.
If the ceiling has had water damage – You do not want to allow it to continue as ceilings are a great place for mould to take hold and start to spread.
Mould growing in the roof cavity will not be noticeable until it is a real problem.

Damp Ceiling Repair

Water damage is one of the main reasons why a ceiling will need to be repaired.
Plasterboard and water do not mix.
Water weakens the plasterboard and will cause it to swell and weaken
Plasterboard sheets are made up of layers of paper and gypsum – neither of these materials are designed to get wet.
Mould will also set into a damp ceiling and this alone can cause serious health concerns as the mould spores are breathed in by the building’s occupants.

Water Damage Or Insurance Work

Your ceiling can easily get wet in Brisbane through a storm.
Water has flooded the gutters and it can be forced up under the gutters into the roof cavity.
Or there may be damaged tiles on the roof. – This often happens if you have had tradesmen on your roof doing repairs such as installing a TV aerial or roof cleaning and resurfacing or when you have had gutters cleaned.
Tiles have been cracked when a tradesman has stepped on one.
You will not know there is roof damage until there is a storm and you have water damage appearing on your ceiling.

Other ways that water can damage a ceiling is when there is a leaking pipe or a leaking air conditioning unit.
If you are seeing damp or wet patches on your ceiling, it’s not something you should easily pass up. In fact, it should definitely be a cause for alarm.
Continuing to ignore water marks on your ceiling, may result in significant ceiling repair costs and long-term problems.

To Repair Instead Of Ceiling Replacement

Repairs can be carried out in many different ways but it will depend upon what is causing the damage.
If the ceiling has a slight sag, you can propping up the ceiling and reattaching sagging boards to the joists.
Areas have had water damage can have the damaged section cut out and the area patched
All repairs will most likely require joins or cracks to be repaired and the ceiling will need to be repainted.

Fixing The Sag

This can be done on ceilings that have slight sags that have recently happened.
Adhesive is injected onto the boards and then the plaster is pushed back into place against the lath and secure it with forms.
This step spreads the adhesive so that it bonds to a greater surface area.

The forms are left in place for a minimum of 24 hours so the glue will set.
Screws can also be added for extra strength.
If the sag is is considerable or it has been like that for considerable time – We do not recommend trying to repair it.
You are battling with gravity and heavy boards are not always going to hold with this method for a length of time.
It can be easier and even cheaper to demolish the ceiling and replace it.
You are then guaranteed of workmanship in this case.

Professional Plastering Work

There is going to be an inconvenience when repairing or replacing ceiling damage.
It will be very dusty when the gyprock sheets are removed and the roof cavity and insulation are exposed.
But once this is demolished and removed, the entire replacement work is done quickly as the plasterboard sheets are large and easy to shape and fix into place
All repairs will require repainting of the entire ceiling.
You cannot just paint one areas as it will not blend.
After the repairs and completed and the ceiling replaced, it will be a noticeably large improvement in how the room looks and feels. It will be lighter and look larger.

ceiling repairs

With our team of experienced plastering contractors, we are sure to give your good and quality plasters for your ceiling not just for a firm structure but a long lasting period of time.

We can repair or replace that sagging ceiling in your home or workplace.

The best news is that all of these services and more are available at an affordable price!
So if you are resident in Brisbane and you need to get your sagging plaster ceiling repaired or replaced, then look no further than the Brisbane Plastering Team

The Article Plaster Ceiling Repairs First Appeared ON
: https://gqcentral.co.uk

Thursday, February 25, 2021

Benefits Of Carpet Cleaning

The Health Benefits Of Clean Carpets

cleaning carpet

The first (and most important) benefit that cleaning your carpet has is that it will improve the air quality of your home and make your home overall healthier.

No matter what you do, dust will come into your home. Even if a house is completely closed, dust manages to come in and it will settle onto all surfaces and the floor is the largest surface in a home!

You can’t imagine how much dust comes out of carpets!

You clean the dust in your home every now and then. But what about the carpet? You might think that you’re vacuuming it often, and that’s enough.

If you have young children, they spend most of their playing time on the floor. Lying on the carpet, crawling on the carpet and playing on the carpet.
They are up close and personal to all allergens and particles that settles into the carpet pile.

Dust Mites, Bedbugs And Pests

Dust mites make their home in houses as soon as dust begins to form.
They can be an unsightly, and certainly unwanted guest found commonly in dusty rugs and carpets.
Bed bugs are also commonplace within these surfaces.
Why are dust mites and bed bugs so bad anyway?
Dust mites in particular are a major trigger for those who are prone to allergies and those who suffer from asthma.
These affects range from mild cases such as runny noses, watery eyes and sneezing, to severe health issues of chronic coughing, congestion and serious asthma attacks.
They are not visible to the naked eye and you will need to treat them effectively.
Professional rug cleaning and carpet cleaners are the best option to ensure your carpets are kept dust mite and bed bug-free providing more comfortable living in your home.

Steam Cleaning Leaves No Residues

While vacuums don’t leave residues, some carpet cleaning machines do. If the equipment or products are old or cheaper, they can be inefficient and leave some of the cleaning solution behind.

On the other hand, the equipment used by steam cleaning professionals is usually eco friendly and uses commercial cleaning products to restore carpeting to a like-new condition.
They also employ the hot water extraction technique to achieve the best results, leaving the fibers free of all dirt and stains.

Clean Carpets Look Awesome!

And it’s not just you. Everybody thinks that a clean carpet looks amazing. It’s nicer to see, nice to walk on. It’s just nicer in every sense!
Many companies can also do soft furnishings at the same time so consider having stained rugs, upholstery or even curtains cleaned at the same time.
Living and working in a clean and neat environment also helps with the general mood and makes you feel better.

Why Use Professional Commercial Carpet Cleaning Services?

As a business owner, you understand the value of investments.
Carpets are an expensive addition to any office or retail space, and professional cleaning can help you protect that investment.
Dirt and soils are abrasive and can damage carpet fibres, leaving them looking dingy.
Regular cleaning with professional equipment removes these abrasives, which lengthens the life of your carpet.
Best of all,professional carpet cleanerscan do the work in your downtime, so they don’t interrupt your business operations.

Removes Smells and Odours

The reason why carpets can still smell even after you’ve vacuumed is that the smell is coming from the bottom of the carpet fibres and there’s no vacuum cleaner that can clean that deep.

So, a deep cleaning method (or steam cleaning method) is the only alternative when it comes to removing that terrible smell that some carpets have.

If a fresh pet stain happens on your carpet – To stop it creating a long lasting smell – you need to clean it up quickly and neutlaise the enzymes that produce the odours.
After you’re done cleaning it, if you want to make sure that that particular spot won’t smell, pour some baking soda and let it sit for 24 hours
The carpet may get a yellowish stain so do not panic.
Vacuum after the 24 hours.
The baking soda will absorb some of the urine that’s in the lower half of the fiber thanks to osmosis.

Extended Lifespan for your carpets

Professional carpet cleaners typically use cleaning methods involving hot water extraction to effectively remove the debris from deep within the fibers and leave the carpet cleaned.
Homeowners can also help decrease the build-up of debris in the carpet between cleanings by vacuuming regularly.
Most carpet owners don’t clean their carpets because they think that doing so is very expensive.

DIY carpet solutions aren’t that expensive.
Or if you do hire professionals to clean it for you, hiring a professional is way cheaper than replacing your carpet.
Almost all people who replace their carpets could’ve increased their lifespan if they had deep cleaned their carpet when they had to.

Carpet Cleaning Required For Any Guarantee Or Warranty

Some manufacturers are more open about saying this out loud than others.
But when you install a new carpet those “X years guarantee” or “100% money back guaranteed if you’re not satisfied” apply under one condition:

you must have your carpet cleaned by a professional every certain amount of time.

Complete Removal Of Dirt And Bacteria

This will come as a given because we’ve talked about this through out the post. But deep cleaning your carpet is the only way of actually removing all the dirt and bacteria from it.

Out of the 5 cleaning methods that the IICRC has approved, 4 of them are maintenance and only 1 of them is considered restorative. That method is the steam cleaning method that most likely ever professional will use.

Carpet Cleaning And Renting

If you want to try and clean the carpets yourself, you can hire portable cleaners.
Be aware that they do leave the carpets wetter than what a commercial quality machine will.
If you are cleaning your carpets for the end of a rental lease – Check with your property manager to see if they will accept DIY carpet cleaning.
Many will not accept it and insist upon a professional companies receipt .

If the carpets were cleaned to a certain standard at the start of the tenancy, the tenant must ensure the carpets are cleaned to that same standard at the end of the tenancy.

However, the property manager/owner cannot require the tenant to:

Leave the property in a better condition than it was in at the start of the tenancy (e.g. require carpets to be steam cleaned when this wasn’t done before they moved in)

These are offenses under the Residential Tenancy Act.

Professional carpet cleaning/pest control at the end of a tenancy depends on the particular case and circumstances and werecommend you the use the best carpet steam cleaner depending on your budget.

Professional Carpet Cleaners Are Fast

Having a professional company clean your carpet is extremely simple.
You just give them a call and they’ll take care of everything.

They can be done in under a couple of hours. If you do it yourself, it will take longer than that.

Professional carpet cleaning companies will have better equipment than you can buy or hire
If your carpet is dirty or stained, you’ll need a professional to help you to get the best results and the these are bestBrisbane Carpet Cleaning company we recommend.

The post Benefits Of Professional Carpet Cleaning appeared first on GQ Central.

Pantry Organization

How many times have you opened up the pantry only to be greeted with a sense of frustration?
Can you relate to these scenarios?

Nothing is where it should be and your kitchen storage is at a minimum.
It is hard to find what you need when you are in a hurry.
You know you bought it last week but why can’t you find it

Pantry Organization Will Also Save You Money!

When you can easily see what food you have on hand it will be used and not be left to spoil in the far back reaches of a bottom shelf

Have you noticed how much space canned foods take up in your pantry?
They do take up the most room but they are one of the easiest things to organize.
Cans are durable and they can be stacked or they are perfect for can racks that you can group all of your can together and you will use them in date order.

By grouping cans into food groups it will help meal planning when checking to see if you have canned tomatoes for pasta sauce or canned fruit for a pie
I group my mine into food groups such as:

Tomatoes
Beans
Tuna/Salmon
Milk/Coconut Milk
Fruit – Apple, Peaches, Pineapple

Then I can quickly replace or buy what I need

Declutter The Pantry With Food Canisters

The other overwhelming part is all the boxes and packets of food.
Often when something is half opened and clipped shut you cannot see what is in the bag or the packet.
I use to double up on so many ingredients thinking I had run out only to find half full packets

Putting dry ingredients into jars and canisters not only looks neater, it will keep you able to manage your pantry inventory plus it stops pests from getting into your food.
Pantry moths and mice cannot get into an airtight container.
Getting containers for food storage does not have to be an expensive undertaking
Read this article about Budget Pantry Jars.

What Sort Of Food Storage Containers?

If you do want to buy some new containers then make sure you look for the term “Air Tight” and of course BPA free plastic.
You can buy Food storage sets that have 12 or even 16 different sized containers – right from the smallest up to large for cereal and tall for spaghetti
The different sizes in a set will allow you to stack them neatly and use all available space in the patry

Some ingredients also need bigger canisters and mouth openings.
I need my flour in a large canister as I put measuring cups in to grab the amount of flour I need – So the opening must be able to fit a measuring cup.
You also need those larger containers for cereal and pasta.
You cannot jam these into small containers unless you want crumbs!

Getting a decent set of containers really helps to create more storage space as they created room so that the family can now easily reach the airtight containers that were hiding at the back of the shelves.

A Cohesive Looking Pantry Is The Goal

Just remember your jars and canisters do not all have to match.
If you have some with black lids some with wooden lids, some square and some round – It doesn’t matter as long as there is something cohesive about all of them and this is easily done by a great set of pantry labels and these are the ones I have bought and now recommend

spice jar labels
You can grab them on Amazon by clicking on the image

Spice Jar Organization

Be careful keeping spice jars close to where you cook
Don’t have them above your cook top as heat and steam is not a friend for your spices!
Keeping them in jars will keep them fresher than keeping them in packets.
I currently have mine in small preserving jars and they fit into a drawer next to my oven
I have labelled their lids so I can see what I need when I pull the drawer out
Spice racks also work really well and they can be kept on a countertop or you can put them into your pantry.
It is easier if you keep your spices in some sort of order
You want to be able to quickly grab the ones you use the most and then to be able to put them back when done with them

The Pantry Door Is A Great Place To Store Smaller Items

The back of a pantry door is an area that you can make use of!
Use it to hang hooks for shopping bags
Or use an over door organizer or there are some light weight racks that can be nailed/screwed into a cupboard door. If you have a door that is suitable but it needs to be fixed – There are kitchen cabinet repair services. You do not want to damage your pantry door.
These racks are perfect for spice jars and other small condiments or small loose items
Another way you can utilize the space at the back of your pantry’s door is to use a shoe organizer.
They come in clear plastic and you can easily store small lightweight items here and they will be easy to find and grab.

Storage Bins for the Refrigerator

If your family is all about quick meals , storage hacks for the refrigerator are a necessity.
Something as simple dollar store bins can make a world of difference.
If you have children, you can place their after-school meals in each container.
Place stickers with their names on it, so they’ll know what bin belongs to whom. Or, you can dedicate each container to a specific meal.
For instance, if lunch for the week is sandwiches, place all the items needed for a sandwich inside.
That way, it’s super easy to grab everything in one swipe; this hack works well for planning weekly dinners too.


Professional Organization Help.

Now pantry organization can be fun once you have got all your jars, canisters and labels assembled.
If you are looking at it and it just seems to much.
Consider using a Pro Organizer and their will be one local to you if you do a search.
They truly are their weight in gold and they can quickly assess what you actually need help with and where to start.

The post Pantry Organization And Kitchen Storage appeared first on GQ Central.

Monday, February 22, 2021

Deck Restoration Guide

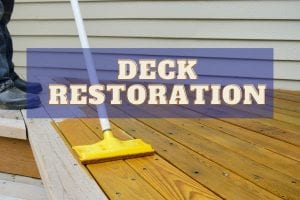
A Step By Step Deck Restoration Guide

A deck is an important part of many Australian homes and adds to our way of life.
They add an extra living space and utility area to your house.
It can be a great place to enjoy fresh air and sunshine in the mornings.
A deck is also be a place to hangout with family and friends to enjoy BBQ’s and parties in the afternoon or evening.

Because of its exposure to harsh elements like the Australian sun, your deck needs routine maintenance that addresses any damage.
This upkeep will protect your outdoor areas and prevent more significant deck problems in the future.
It will also keep the deck in great condition for many years.
Deck restoration is one of the best ways that you can use to improve the appearance of your old deck.

decc care and maintenance

Here is a step by step guide to restoring your outdoor space.

  1. Inspect The Deck’s Surface

The impact of harsh weather conditions, including UV rays, high heat, and rain, can damage your deck structure.
Before starting your deck restoration project, it’s essential to start by thoroughly inspecting your deck surface.

In this step, you’ll look for any loose deck boards. You can also check if there are structural component issues such as rotting or split boards. It is a good idea to also check railings or the pergola to see if these need to be repaired at the same time

Use a leaf blower or a broom to remove any debris on the surface.
You can as well use a scraper to remove any dirt and debris trapped in between the deck boards.

  1. Lightly Clean Your Deck

The correct method of cleaning your deck depends on its finish and your end goals for restoring it.

If you’re restoring a deck that has been formerly coated with paint:
You may need to use a paint remover to strip off the paint. Then, clean and sand the surface before applying a new stain or finish
However, if you’re only painting, the process will involve cleaning, sanding, and then repainting.

Wear protective clothing such as gloves at all times to keep yourself safe from splashes and fumes
If your outdoor space is not painted but has a stain, you don’t need to apply a paint remover.
Just use a deck cleaner to clean the wood surface.

Oxygen-based wood cleaners are known to be the best and most effective cleaners for eliminating mildew stains.
These cleaners will also remove any graying caused by ultra-violet exposure.
Additionally, they will clean the wood surface, eliminating all dirt and deposits.

  1. Deep Clean The Deck Using A High Pressure Cleaner.

Deep cleaning is a significant step in deck restoration.
A power washer can be a highly useful tool for deep cleaning a deck.
However, it can easily damage your surrounding outdoor entertainment area if it’s carried out incorrectly. Using excessive water-jet pressure or an incorrect sprayer technique can etch away the surface of the wood. It may also wreck some of your deck boards and surrounding paint work

When deep-cleaning your wood deck using a power washer, ensure that you use the minimum pressure that offers effective cleaning.
For softwoods like pine or cider, the recommended pressure is approximately 500 to 600 pounds/ square inch (psi). If your deck is made up of harder woods, you can use higher pressure which shouldn’t exceed 1200 to 1500 psi.

pergola for the pool

  1. Sand Your Deck

After you power-wash the deck boards, the wood fibres increase as they swell with water.
Once the wood fibres are dry, they may have extra splinters. For an effective sanding, you have to sand the entire area before staining.

Sanding your deck will be easiest if you use an orbital sander. However, the right sandpaper is vital to have excellent results. Sandpapers that are too fine leave the deck wood pores full of fine dust that prevents soaking of the stain.
Using a sandpaper that is too rough can damage the wood, particularly the softer woods like cider.

For the main deck boards, the ideal sandpaper grit should be 60 or 80.
You can use a sandpaper grit of 80 or 100 for the handrails.
After the sanding, make sure you sweep and vacuum all wood surfaces thoroughly. Avoid rewashing the deck as doing so might cause swelling to the wood grain and coarsen the sanded surfaces.

This step is very vital in the preparation so take adequate time in it to ensure your deck is entirely clean and has no damage or anything to stop the stain or paint from adhering to the wood.

Since sanding is a dusty process, safety equipment like wear some eye protection and a mask are a good idea

  1. Choosing The Timber Stain

Choosing the stain is one of the most significant steps in your deck restoration project.
There are various types of staining products.
One is the semi-transparent stains that permit the deck wood grain to be noticeable through the stain.
There are also opaque stains that dye the deck wood and conceal all the wood grain.

Additionally, you can find oil-based as well as water-based stains.
The water-based stains are known to offer easy cleanups.
However, nearly all experts will agree that most water-based outdoor stains have a shorter lifespan than oil-based products.

A quality oil-based stain is the most recommended stain for your outdoor area.
It’s an outdoor semi-transparent stain that soaks thoroughly into the wood grain.

Once applied, the final color of the stain may differ from the color brochure.
This can be due to the type of timber you have stained and many companies do have comparison charts to show the color examples on different timbers.

  1. The Stain Application

Applying the stain is the last step in your deck restoration project.
Ensure you use the right brush or roller to soak the stain into your deck’s timber surface.
The right brush or roller will also help to control the consistency and even application of your staining process.

Remember your deck must be completely dry before you stain it. It is critical to that your deck is left to dry for approximately two days before proceeding with the staining step.
Water present in the wood pores will stop the adequate absorption of the stain into the timber.

Deck restoration may seem like a big task and if it does seem like too big a job – Then there are many professional Brisbane deck builders that also do deck restoration.
If you are confident and have the time, then by simply following the above steps, you’ll make your old deck look like new once again.

The post Deck Restoration Guide appeared first on GQ Central.